


 Login
 Blog
Conveyor Accumulation Sizing: How Many Minutes of Buffer a Line Needs

Key takeaways
- Buffer minutes = units held / speed of the machine the buffer protects (Little's law).
- Compare buffer minutes with the stop lengths of the neighbouring machines, not with averages.
- A buffer only helps if it refills: refill time = units to refill / spare speed.
- Buffers change with formats: a bigger container means fewer units on the same conveyor.
- A buffer hides a stop; it does not remove it. Fix the stop causes too.
Size accumulation in minutes, not in bottles or metres: buffer minutes = units the conveyor holds / speed of the machine it protects. Make the buffer long enough to cover the usual short stops of the machines next to the bottleneck, and give those machines enough spare speed to refill it.
Fabrico, an OEE and light MES platform, logs each stop on each machine with its length, which is the data you need to size a buffer: how long the stops around the bottleneck really last. This guide shows how to calculate buffer minutes, how to compare them with your stop lengths, why recovery speed matters as much as size, and a worked example.
What does an accumulation conveyor do?
It decouples linked machines, so a short stop on one does not stop the others at once. On a packaging line the most important buffers sit around the bottleneck, usually the filler:
- In front of the filler: keeps the filler fed when an upstream machine, such as the depalletiser or blow moulder, stops.
- After the filler: gives the filler somewhere to send product when a downstream machine, such as the labeller or packer, stops.
When the buffer runs out, the filler is starved or blocked, and the line loses output. Our guide to starvation and blocking explains how to read those states.
How do you calculate buffer minutes?
Little's law links the three numbers: units held = rate x time. Turned around, the time a buffer can cover is the number of units it holds divided by the rate of the machine it protects.
- A table holding 1,500 bottles in front of a filler running 500 bottles a minute covers 3 minutes.
- A conveyor holding 1,000 bottles after the same filler covers 2 minutes.
- Measure the real capacity per format: a 1.5 litre bottle takes more space than a 500 ml one, so the same conveyor holds fewer of them and fewer minutes.
How many buffer minutes does a line need?
Compare the buffer with the stops it has to absorb. Take a few weeks of stops for the machine next to the buffer and group them by length. A buffer that covers most of the short stops keeps them local; the long breakdowns will still reach the filler, and no reasonable buffer will change that.
Look at the distribution, not the average. An average stop of 2 minutes can hide hundreds of 30 second jams and a handful of 15 minute faults. The buffer decision depends on how many stops sit just above the current buffer length.
Why does recovery speed matter as much as size?
After a stop, the buffer has to refill (in front of the filler) or empty (after the filler) before it can absorb the next one. That takes spare speed: the neighbouring machine must run faster than the filler for a while.
- Refill time = units to refill / spare speed.
- In the usual V-curve design, the filler's neighbours run about 10% faster. At 500 bottles a minute, that is 50 spare bottles a minute.
- A fully drained 3 minute buffer (1,500 bottles) then needs 1,500 / 50 = 30 minutes to refill.
If stops come more often than that, the buffer is rarely full when the next stop arrives, and its real protection is much smaller than its size suggests.
What does a sizing example look like?
Sample line (illustrative numbers, not a customer): a filler at 500 bottles a minute, with a labeller after it. The conveyor between them holds 1,000 bottles, a 2 minute buffer. The plant asks whether doubling it to 4 minutes is worth it. One week of labeller stops, simplified so each group has a typical length:
| Labeller stop length | Stops a week | Typical length | Filler minutes lost, 2 minute buffer | Filler minutes lost, 4 minute buffer |
|---|---|---|---|---|
| Under 1 minute | 220 | 0.5 | 0 | 0 |
| 1 to 2 minutes | 90 | 1.5 | 0 | 0 |
| 2 to 4 minutes | 40 | 3 | 40 | 0 |
| 4 to 10 minutes | 12 | 6 | 48 | 24 |
| Over 10 minutes | 3 | 15 | 39 | 33 |
| Total | 365 | 127 | 57 |
- With 2 minutes: each stop blocks the filler for its length minus 2. For example 12 x (6 minus 2) = 48 minutes.
- With 4 minutes: the 2 to 4 minute group disappears, and the longer stops lose 2 minutes each.
- On paper, the bigger buffer saves 127 minus 57 = 70 filler minutes a week, or 70 x 500 = 35,000 bottles.
- But check the refill: a drained 4 minute buffer is 2,000 bottles, and with 50 spare bottles a minute it needs 40 minutes to refill. With 365 stops in a week of about 120 running hours, a stop comes roughly every 20 minutes. The buffer will often be part empty, so the real saving is smaller.
The better first move here may be to cut the 40 stops of 2 to 4 minutes at the labeller, or raise its recovery speed, before adding conveyor. Our labeller OEE guide covers those stops.
Which mistakes make buffers fail?
- Sizing in bottles or metres instead of minutes at the bottleneck's speed.
- Sizing for one format and never checking the others.
- Setting recovery speeds once and never again, while formats and speeds change.
- Looking at the average stop length instead of the distribution.
- Using a bigger buffer to hide a stop cause that could be fixed.
- Forgetting that a buffer that never refills protects almost nothing.
To check which machine really limits the line before you change any buffer, see our guide to finding the real constraint on linked packaging lines and filler OEE on a bottling line.
Where Fabrico fits
Fabrico is a computer vision enabled Manufacturing Performance Platform. OEE and light MES come first, with computer vision on stops.
- Automatic downtime logging on every machine, so you have the real distribution of stop lengths.
- Starved and blocked time kept apart from own stops, so you see which stops reached the filler.
- The operator confirms the reason in one tap, so the stops just above the buffer length have causes.
- Every loss priced in money and ranked, so a buffer change can be compared with fixing the stops.
- OEE live by line and shift, before and after a change.
You start with a pilot on one line, with a baseline and a decision date agreed in advance. There is no free plan and there are no tiers: each plant gets a quote. Read how a light MES starts on one line in our light MES guide.
Frequently asked questions
How do you calculate accumulation buffer time?
Divide the number of units the conveyor holds by the speed of the machine it protects. 1,500 bottles in front of a 500 a minute filler is 3 minutes.
How big should an accumulation buffer be?
Big enough to cover most of the short stops of the neighbouring machines. Compare it with the distribution of their stop lengths, not with the average.
What is recovery speed on a packaging line?
The extra speed a machine next to the bottleneck runs at to refill or empty a buffer after a stop. In the usual V-curve design it is about 10% above the bottleneck.
Why is my buffer not preventing filler stops?
Either the stops are longer than the buffer, or the buffer does not refill between stops because the neighbouring machine has too little spare speed.
Should I add conveyor or fix the stops?
Price both. Fixing the stops just above the buffer length often recovers more than extra conveyor, and it does not depend on refill time.
See your buffers in a demo
Bring one line and a few weeks of stop data. We will show which stops reach the filler and what each one cost.
Latest from our blog




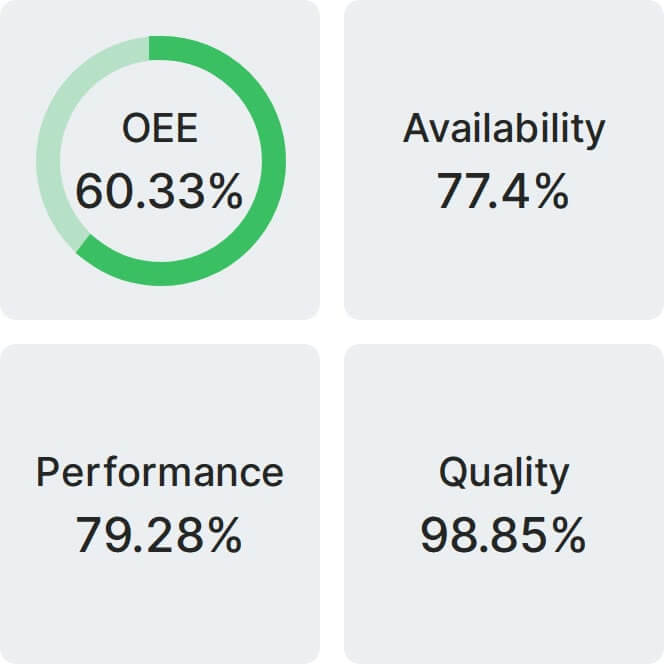
Real Fabrico tiles, sample data.