Login
 Blog
Shrink Wrapper and Tray Packer OEE: Film, Tunnel, Jams, Blocking

Key takeaways
- On a line built to the V-curve, the shrink wrapper is faster than the filler by design. Judge the line at the filler's rate and the wrapper by its own stops.
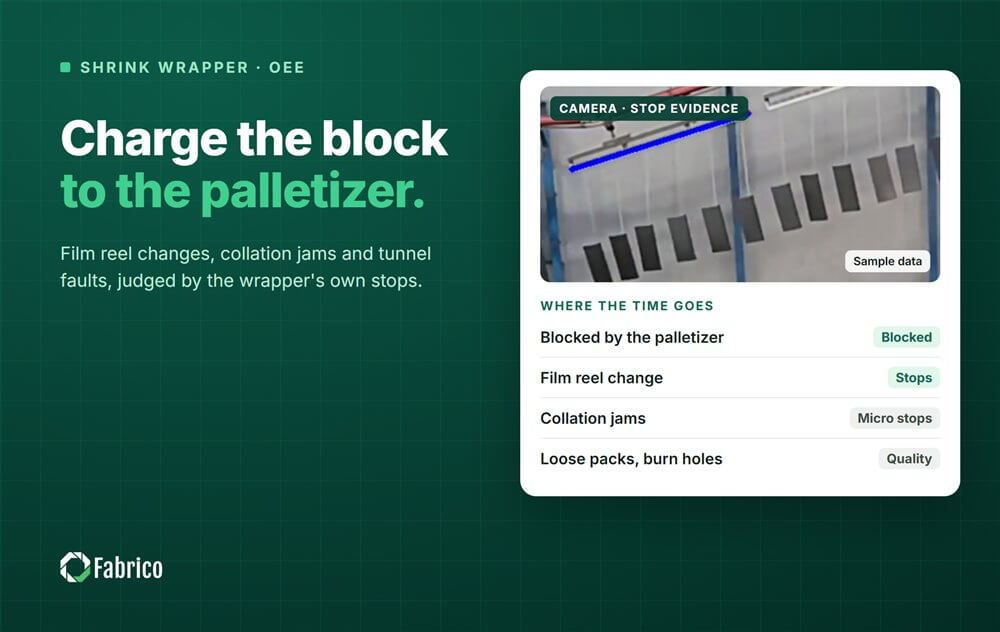
- Time blocked by the palletizer is lost time for the wrapper, but the cause sits downstream. Code it as blocked and charge it to the palletizer.
- Film reel changes, blank magazine refills and collation jams carry most of the wrapper's own stops.
- Tunnel temperature decides start-up time and pack quality: loose packs, burn holes and crushed trays are Quality losses.
- The PLC says the infeed stopped. A camera over the collation shows the tipped bottle behind it.
The bottles are backing up on the infeed table. The shrink wrapper has stopped again with its outfeed full, because the palletizer is waiting for a slip sheet. On the shift report it will read as twelve minutes of wrapper downtime, and the OEE meeting will talk about the wrong machine.
Shrink wrappers and tray packers sit between the filler and the palletizer, so they get blamed for losses on both sides. They also have plenty of their own: film, blanks, glue, collation and the tunnel. Measuring them well means separating the wrapper's stops from the stops it only suffers.
Below: the stations, the ideal rate, blocked time, stops, changeovers, the tunnel, data sources and a worked shift.
Where the time goes on a shrink wrapper
In flow order: the infeed with its lane dividers, the collation section that groups containers into the pack pattern, then on a tray packer the blank magazine and the station that forms the tray or pad with hot melt glue. The film comes off the reel, is cut to length and wrapped around the group by the flight bar. The pack then rides through the shrink tunnel, cools, and leaves for the palletizer.
Each station has its own way of losing time. Collation jams when a container tips or a lane runs short. The blank magazine runs empty or feeds two blanks at once. Glue guns clog or string. Film runs out, breaks, tracks off or is cut in the wrong place. The tunnel holds the infeed until it is at temperature. And the outfeed fills when the palletizer stops.

The ideal rate on a V-curve line
Most packaging lines are designed to the V-curve: the slowest and most expensive machine, usually the filler, sets the pace, and the machines either side of it run faster in recovery speed, each one further out faster again, so the conveyors can empty and refill around the filler (LineView on the V-curve). The shrink wrapper is one of those faster machines.
That has a consequence for OEE. If you set the wrapper's ideal at its own top speed, its Performance will always look poor, because it spends part of every hour waiting for the filler. That is the design working, not a loss to chase.
So measure two things. Line OEE uses the filler's rated speed, expressed in packs: a filler rated at 600 bottles a minute feeding packs of six is 100 packs a minute. The wrapper itself is judged by its own stops, its rejects and how fast it recovers after the line restarts. Set its rated speed per pack format, because a 4 x 6 pack and a 2 x 3 pack do not run at the same cycle rate.
Blocked by the palletizer, starved by the labeller
A machine is blocked when it is fine but its outfeed is full, and starved when it is fine but nothing arrives. For the wrapper's own record, both are lost time. For the line, they belong to the root-cause machine: the first machine that stopped. Charging blocked time to the wrapper sends the fitter to a machine that has nothing wrong with it.
The fix is in the reason codes. Give blocked and starved their own codes, separate from the wrapper's own faults, and record which machine caused them. Where the machines report their states, the stop can be tagged as blocked automatically. Our guide to starvation and blocking explains how to trace the chain, and finding the real constraint on linked lines covers which machine sets the pace.
Typical stops and their causes
| Station | Typical stop | Usual cause | Whose loss |
|---|---|---|---|
| Infeed and collation | Collation jam, lane short | Tipped or damaged container, guide set wrong for the format | Wrapper, or upstream if containers arrive damaged |
| Blank magazine | Magazine empty, double feed, misfeed | Refill late, blank quality, warped blanks | Wrapper, or the blank supplier |
| Tray forming and glue | Tray not formed, glue not holding | Clogged glue gun, glue temperature, nozzle wear | Wrapper |
| Film unwind and cut | Reel end, film break, cut fault | Splice, film tension, knife wear, print registration | Wrapper |
| Shrink tunnel | Infeed held, packs rejected | Tunnel below setpoint, airflow, belt speed | Wrapper |
| Outfeed | Outfeed full | Palletizer stopped, pallet or slip sheet supply | Palletizer |
| Infeed | Nothing arriving | Filler or labeller down | Upstream machine |
Set a stop cutoff and keep it. Collation jams cleared in under a minute rarely reach a paper log but often add up to more lost time than the breakdowns. Below the cutoff they are booked in Performance, which is why micro stops on packing lines need their own count rather than a single speed loss figure.
Film reel changes and format changes
A film reel change is a planned event that happens unplanned: the reel runs out when it runs out. Give it its own code, count how many per shift and how long each takes. If the next reel is not at the unwind when the old one ends, the stop gets longer every time. The same goes for blanks and glue: a magazine refill that waits for a forklift is a material supply stop, not a machine fault.
A format change on a tray packer touches most of the machine: lane dividers and collation pattern, blank size, tray forming parts, film width and cut length, tunnel settings, and the outfeed pattern for the palletizer. Count it from the last good pack of the old format to the first good pack of the new one at rated speed. Split the steps into those that need the machine stopped and those that can be done while it runs, and write down the settings for each format.
The tunnel and quality losses
The shrink tunnel shapes both start-up time and pack quality. At the start of the shift, or after a long stop, the infeed is held until the tunnel reaches its setpoint. That wait is a start-up loss and deserves its own code. Packs left inside the tunnel during a long stop can come out over-shrunk or burnt.
The quality losses on a shrink wrapper are easy to name: loose packs that did not shrink tight, burn holes, a print or opening that is off centre, the wrong count in a pack, crushed or open trays, and glue that lets go. Each rejected pack counts against Quality, and so does a pack that is rewrapped by hand. Count rejects by cause, not as one number, because a tunnel problem and a glue problem have different owners.
What each data source sees
- The PLC gives the state, the alarm and the pack count. On many lines it can also say whether the wrapper is blocked or starved.
- The pack counter and reject counter give real output and rejects.
- A camera over the collation and infeed shows what the alarm cannot: the tipped bottle, the lane running short, the film wrapped round a roller. The clip is the evidence for the stop.
- The operator confirms the reason. A list of codes that fits on one screen keeps the data clean; our guide to downtime reason code design shows how.
A worked shift
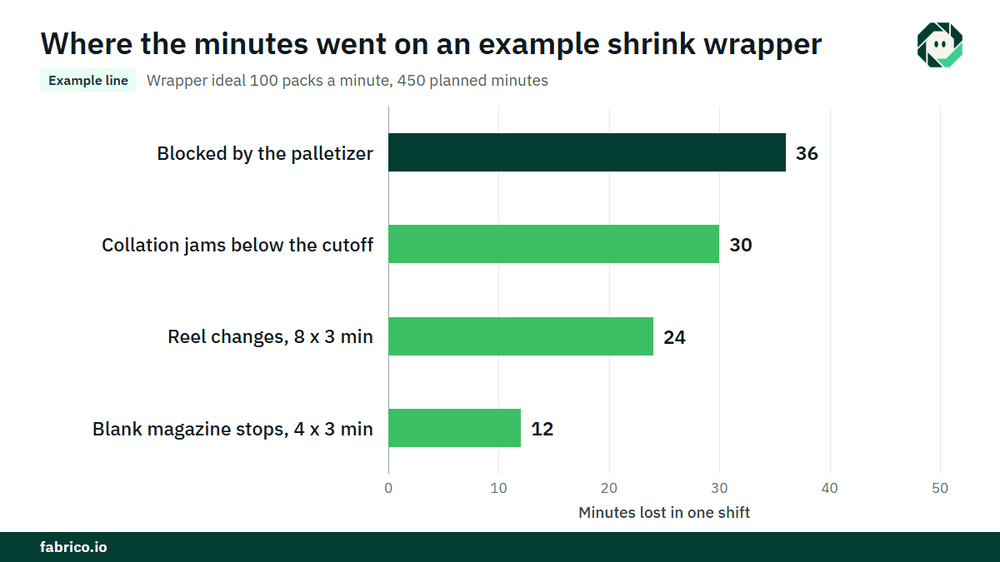
Sample line (illustrative numbers, not a customer): the filler is rated at 600 bottles a minute into packs of six, so the line's ideal rate at the wrapper is 100 packs a minute. The shift has 450 minutes of planned production time. Stops above the 2-minute cutoff: eight reel changes of 3 minutes (24), four blank magazine stops of 3 minutes (12) and 36 minutes blocked by the palletizer. Downtime is 24 + 12 + 36 = 72 minutes, so run time is 378 minutes and Availability = 378 / 450 = 84.0%.
At 100 packs a minute, 378 minutes should give 37,800 packs. The counter shows 34,800, so Performance = 34,800 / 37,800 = 92.1%. The 3,000 missing packs are 30 minutes at full rate, and the stop log shows 30 collation jams of about a minute each, all below the cutoff.
Rejects are 348 packs, so the good count is 34,452 and Quality = 34,452 / 34,800 = 99.0%. OEE = 0.840 x 0.921 x 0.990 = 76.6%. Check: 34,452 good packs out of 450 x 100 = 45,000 possible is 76.6%.
Now price it at a contribution of $0.50 a pack, €0.50 in a euro plant. The 36 blocked minutes are 3,600 packs, or $1,800 (€1,800), and they belong to the palletizer, not the wrapper. The collation jams are 3,000 packs, or $1,500 (€1,500), and they are the wrapper's own.
Where Fabrico fits
Fabrico is a computer vision enabled Manufacturing Performance Platform. On a shrink wrapper or tray packer it starts with OEE and light MES: automatic downtime logging from the machine signal, and OEE live by line and shift, so blocked minutes, reel changes and collation jams are recorded without a paper log.
The operator confirms the reason in one tap, so blocked by the palletizer gets its own code instead of landing on the wrapper. Where a camera watches the collation, a camera clip is kept as evidence for a stop, and the camera only suggests the reason.
Losses are priced in money and ranked by money, so the palletizer's share and the wrapper's share each get a figure. A breakdown becomes a work order to the right technician with its cost. One view across plants compares the same machine type on every line, and you start on one line with a decision date agreed in advance. See how downtime tracking records each stop.
Each plant gets a quote after a review of its lines.
Frequently asked questions
How do you calculate OEE for a shrink wrapper?
Availability is run time over planned production time. Performance is the pack count over run time times the ideal rate. Quality is good packs over all packs. For line OEE, use the filler's rated speed expressed in packs as the ideal.
Should blocked time count against the shrink wrapper?
It is lost time on the wrapper's own record, but the cause is downstream. Code it as blocked, record which machine caused it, and charge it to that machine in the line's loss figures.
Why does the shrink wrapper show low Performance when it never stops?
On a V-curve line the wrapper is faster than the filler, so measured against its own top speed it always waits. Judge the line at the filler's rate and the wrapper by its own stops and rejects.
What causes loose packs on a shrink wrapper?
Usually tunnel temperature, airflow or belt speed away from the format's settings, or film of the wrong gauge or shrink rate for that pack. Check the tunnel against the written settings for the format first.
How long should a tray packer format change take?
There is no fair general figure: it depends on how many parts change. Measure it from the last good pack to the first good pack at rated speed and set a standard per format.
See your packing line's losses in a demo
Bring one shift of data from your wrapper and palletizer. We will show which stops are the wrapper's own, which belong downstream, and what each costs.
Latest from our blog